Thursday, 30 June 2016

Active Loudspeaker!

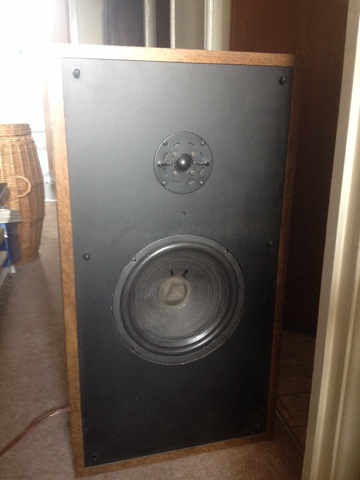
A bit of an anti-climax, perhaps, but I've now got an active Boston A100 :-o.

I removed the original back terminal plate, hot glued onto the inside of a hole in the back of the speaker. I then removed the fuse and terminals from the board, so I could reglue it back inside the box to support the original crossover components. I then wired up a DPDT switch and the new "biwire" terminal block, so that the speaker can be used active of passive at the throw of a switch. The hole in the back of the speaker was too wide for the new block, so I filled it with a piece of 18mm chipboard (actually from some old G-Plan furniture shelves we scrapped a few months ago! Very decorative...).

Taking out the old terminal panel

Refitting the old panel with the original crossover components

The original hole filled to fit the new terminal block

New terminal block, with separate woofer/tweeter wires, also shows active/passive switch

Setup with Safire DAC, Myst stereo amp and speaker
The original crossover is shown below diagrammatically - I used an online tool which is a bit pants but hey...
Original Speaker wiring

And this is the revised version, which allows the woofer and tweeter to be completely separate.

Active/Passive switching circuit
Except that now I look at that, I see a massive inductor wired permanently across the woofer terminals... Albeit through a few caps and a resistor. Damn... Will this have an effect? Arguably, I should disconnect the entire old crossover network. That requires another or different switch. Later - I have other difficulties!


Monday, 27 June 2016

Audio Programming discoveries

As part of looking for digital audio solutions, I've come across a number of people who've implemented their own multi-way system, using their own code to construct the filtering, EQ and crossover features. Cool. So I lashed out on a few books, in an attempt to understand the principles of digital audio a bit better, not least, to see if there's any chance that I could emulate the heroes who have already "rolled their own"!

  • Understanding Digital Signal Processing 3/e
    • Heavyweight! Came from an Indian bookseller, really quickly, so certain impressed with the service
  • Signals & Systems For Dummies
    • More useful, because reasonably well-structured and intended to be slightly more practical
    • However, the maths is very daunting, because I'm not sufficiently practised with series manipulation etc.
  • The Audio Programming Book
    • Now this is interesting! 
    • It's entirely practical, intended to support a course on digital music making, so it's based on using C and Csound to create and manipulate digital audio, which allows one to look at exactly what implementing a lot of this otherwise theoretical stuff involves
    • Of course it covers the maths to some extent, but it's kept to simple stuff that allows one to address using digital techniques to create and process audio, which along with the concrete implementations available to look at, really brings home the concepts
    • Example: I've had many explanations of FIR vs. IIR filter principles, but this book says, very simply, 
      • FIR is based on feed forward i.e. input delay so that future signals can be used to transform the current signal; this explains why a filter with a large number of poles (pole = number of future signals used) will require a significant delay in the eel-time audio signal
      • IIR is based on feed back i.e. output delay so that past signals are used to transform the current signal
      • And a filter can in principle use both techniques as required. Marv!
So now I'm bashing away at some simple C programs that might form the basis of my own digital processing capability.

Meanwhile, I've also been playing around with the Apple AudioUnit based mechanisms, in order to implement a simple 2-way crossover for the Boston A100. The plugins available include 
  • Graphic Equalizer - nice, but no info on its phase relationship
  • Parametric Equalizer - likewise
  • Sample Delay - now this is interesting! It allows a 1 - N sample delay to be dialled in, allowing granularity of ~ 1/50000 sec... i.e. the sample rate of the digital audio. Nice.

Tuesday, 21 June 2016

Testing speaker response

Obviously (is that patronising? I hope not...) the secret of success here is measuring things so the we have some idea of how well we're doing. Note the use of the plural first person pronoun here, much like the usual racing driver/rider who likes to blur the effect of his (usually his!) massive ego on the listener.

How to do that? I have
  • Measurement software - REW, Java-Based, runs on the MacBook Pro
  • Measurement mic - UMK-1 from the miniDSP chaps - a USB mic that plugs into the MacBook Pro
  • A DAC (Safire) that will allow the MacBook to drive the amp/speaker under test
There are huge drawbacks to performing speaker measurement in a room, largely because of the effect of the room on the measurement (resonant frequencies, reflections from surfaces) which all distort the response, usually but emphasising or reducing certain (ranges of) frequencies, and introducing phase distortion. So how do we get around all this?
  1. Do it in an anechoic chamber - which I don't have
  2. Do it outside; requires speaker to be well off the ground, or ground reflections distort the measurement; this is possible, but apparently Altec engineers used to put their speakers 30ft off the ground; er, no
  3. Do it inside but in the near-field i.e. stick the mic sufficiently close to the speakers that the room effects are minimised; also do several measurements at different places and integrate them all
This forum entry has lots of info on the 3rd approach, but doesn't use REW for measurements in the first instance, largely because the old version referenced doesn't do integration and dynamic gating (allowing for events within a certain time period, thus reducing room effects). 

Approach:
  1. Take on-axis frequency sweep measurements 
    1. 3" from woofer
    2. 3" from tweeter
    3. 1' from woofer
    4. 1' from tweeter
    5. 3' from tweeter
  2. Integrate these measurements to get 3 (3", 1', 3') (how do I do that in REW? Apparently it's the "Average the responses" button!) Note: This destroys the impulse response calculation - you need a single measurement to preserve this
I'm inclined to do both at once - near field and outdoors; how can it hurt?
Here's the test setup in all its glory:
  • Speaker raised off ground
  • Mic positioned on axis 3" from tweeter
  • Laptop running REW
  • Safire plugged into Mac and Myst TMA-5 amp, which is wired to speaker
Problems
  • Ambient noise - a neighbour has started to mix cement...
  • Rain?
  • REW's interface allows one to mis-save files with confusing/repeated names
  • I'm not very thorough!!
Results
1m response, mic between W/T, on axis
The above graph shows a bit of a droop 2.5-7kHz, interesting. The 2kHz XOver region is not bad. Phase looks a bit biffo. There are some effects from the reflections from the ground, especially around 110Hz - this is probably due to the height from the ground and distance to mic (110Hz 180deg phase is 1.5m approximately, which would be about right).

30 cm on-axis, centred on woofer
This shows a much smoother bass response, with little/no interference effect from the ground. Interesting 2kHz dive - is this interference between woofer/tweeter? The tweeter/woofer are about 25cm apart, and the mic 30cm from the front of the cabinet, which gives a tweeter-mic distance of 39cm, so a difference between W-M and T-M of 9cm, for a wavelength of 18cm which is about 1800Hz. Close enough. It's also in the crossover region which is pretty scary.
30cm on-axis, centred on tweeter
There's a similar thing happening with the on-axis tweeter response, although the frequency is lower - about 1.8kHz interestingly. Did I mess up my calculations above?

30cm on-axis, averaged W/T response
This is the averaged W/T response from 30 cm - note the inter-driver interference dip abut 1800Hz! There's a big suck-out 2-10kHz, or it could be seen as top-end brightness, since it's often good to roll off the top end a bit.


7.5cm on-axis, averaged W/T response
This doesn't look too bad - we aren't getting so much of the W/T interference at this point.

Conclusions

Not sure what to conclude here, apart from
  • Overall response not too bad, with reasonable integration between W/T
  • Bit of a dip 2-7kHz, with rising 10kHz
  • Bass drops off from 80Hz - this speaker is supposed to be used against a wall, which would reinforce that
I'd like to test the drivers separately - oh, I will :-). Hurray.


Monday, 20 June 2016

Back on the Crossover Trail

While the glue is setting, I'm busy trying to set up the crossovers and a suitable DAC unit. It won't be the first item tested, I'm going to measure the speakers with the original passive crossover before I do that!
AU Lab in action!
In order to check out the overall approach, I'm using my MacBook Pro to implement a first pass at a digital active crossover. I'm doing this using the highly amusing AU Lab application, an Apple tool that allows one to configure an input and output set in a "document", and apply Audio Unit plug-ins as effects in the various positions. Basically, my document has 1 stereo input, and two stereo outputs, to which I've applied HP and LP Linkwitz-Riley crossover filters with an initial -24dB/octave slope, at the 2000Hz that these speakers are apparently constructed with.

You can see the document template (Studio window above), which has the input set to built-in mic (I override that) and two output channels, assigned to channels 1-4 of the Saffire DAC. 

I've configured an additional input, using the AUAudioFilePlayer plug-in, that sources digital audio from a list of specified files. This is routed to output groups 1 and 2, so both woofers and tweeters get full-range signal. The setup for that is in the Generator 1 window.

The channels labelled Woofer and Tweeter have the crossovers set up in their effects link, using the AU Crossover plug-in I found in the interweb. The settings can be seen in the respective windows.

Listening to the Saffire outputs with headphones (yes, they're that high a level!), the crossovers are clearly working. I'm surprised how high the woofer signal goes, but then, I am deaf from 10kHz up, and this does cut off at 2kHz! The tweeter signal clearly has no bass or mid, again it's surprising how little seems to have gone until you compare it with the woofer signal. Marv. Now back to the speaker mines...

I've also implemented a simple Stereo In/Stereo Out setup so I can test the speaker(s) with the existing passive crossovers.

Refoaming the woofers

A tricky job! Full instructions provided by Simply Speakers, who got the new foam kit to me about as fast as it possibly could have from Florida, but I wasn't here to receive it initially.
The speaker as it came out of the box
Bleuch! Pretty messy, the foam is totally shot, just crumbles away.

Ripped all the loose foam off...
First job is to remove the loose foam - just messy, not hard!
Cleaning up the gasket
The gasket is removed with a craft knife run around the chassis under the gasket. Not hard, but cleaning the glue off the foam gasket is a bit tricky, because it tends to remove the top layer if you're not careful.

Speaker chassis before cleanup
You can see the old glue and foam on both the chassis and the speaker cone. All needs to come off, although the tutorial video says not to worry too much about any glue on the chassis, just make sure the foam is off.

Speaker chassis cleaned up
Cleaning the chassis is mostly a scraping job, it's metal so not hard to get the crap off.

Cone after cleaning (not a good shot!)
Then the cone has to be cleaned with alcohol or cellulose thinners. I went to the car accessories shop and bought some thinners - phew!! Heavy duty stuff, with a tendency to melt the plastic handle of the craft knife! You just rub it on with some paper towel and then scrape gently to get the grunge off - it's quite difficult, but eventually you can see dull clean paper and glossy remaining glue, which you then work on.

Glue foam to the cone
The procedure is conceptually simple - glue the surround to the cone, then glue it to the chassis. Apply glue to the surround whilst resting it on the chassis upside down, then flip it over. The glue takes a few minutes to get tacky, so you have to keep rotating and pressing to get it to stick. It eventually does!

Attach surround to chassis
Same principle applies - put the glue on the chassis, smunge the surround on to it to spread the glue out, then rotate and press continuously until it sticks. Keep bouncing the cone lightly in and out to check it's centred - this is the most worrying step because of course if it isn't, the speaker is useless! Eventually, the glue dries enough for it to stick the surround down where you want it, and the breathing and heart rates slow down :-). Seems ok. You have to wait at least an hour between gluing steps, so off to do something else for a bit while that happens...

I also glued the gasket back on, using a similar technique, then left it all overnight.

Speaker restored and operational!
No shot of the finished speaker outside of the box, but here it is in its glory, actually working. Hurray!


Saturday, 4 June 2016

Speakers - doing it!

Right, here's the plan...
Edited:
2016-06-05: Reflect rotted speakers in actions
2016-06-09: Modify to use Mac-based XOver initially to simplify and expedite initial efforts, and initial test approach

  1. Speaker setup 
    1. Download rePhase onto Windows laptop - DONE
    2. Get A100 speaker(s) from bedroom - DONE
      1. Problem... bass units have rotted foam and are utterly useless!! What's Plan B?
      2. Plan B: Buy reforming kit from US, and repair speakers!! Might as well, it's $60-ish, at 1.40, so probably a good £40 value. This does mean that things are delayed slightly, but there's lots more to do - see below! [Note: Speaker surround replacement guys in States are going to take a week to ship it, which is very impressive!]
    3. Conduct REW measurements to obtain reference response of current analogue XOvers
    4. Modify A100 to expose loudspeaker units for direct (no crossover) connection
    5. Connect A100 to amplifier (Chord? Myst!!)
    6. Make near-field measurements of A100 speaker units using REW + UMK-1 (hurray)
      1. This previously involved Focusrite audio interface and MB Pro; could now possibly be done with USB DAC + MB Pro
    7. Export REW measurements to files
    8. Import files into rePhase
    9. Create FIR config files for A100 units
  2. Software setup - initial
    1. Set up XOver VST plugins within AULab on Mac for appropriate curves - uses nice interface, so easy initially! Will be IIR, not FIR, but let's get the speakers working
    2. Will have to use current stereo DAC as Woofer/Tweeter channels - how do I do that?
    3. Use Mac for source material - simplest initial approach
    4. Connect Mac to amp via DAC
    5. Test - quietly! Initial tests with pink noise preferably
  3. Software setup - target
    1. Set up BruteFIR on RPi as per Mac-based XOver
    2. Use MPD as a source... might be easier to go back to original RPi rasbian-based MPD setup rather than Rune, so I'm not struggling with that as well!
    3. Connect RPi to amplifier
    4. Test setup!! Starting very quietly...
  4. Final checkout
    1. Repeat REW measurements with new DSP crossover!
  5. Set up HDMI etc. to AV amp and test!
Fark! So much to do!! So little time!!!

Speaker thoughts

As mentioned earlier (http://johnsraspi.blogspot.co.uk/2016/03/thinking-so-far.html) I have also been thinking about loudspeakers, especially active with DSP-implemented crossovers. This approach makes a great deal of sense to me:
  • Realising analogue crossovers is an incredible PitA, and has lots of technical drawbacks
    • Getting the right component values and adjusting them (actually impossible!)
    • The general inefficiency of driving lots of additional analogue crap as well as the speakers
    • Their phase response is horrible - and I'm utterly convinced that accurate phase response across the audio band is critical to good quality! For example, it's a characteristic of the Chord DACs which I've been very impressed with in the past
    • The only slight advantage is they generally only require a single amp per speaker, which is ok, but actually is another drawback - any distortion is reflected in all units, and the different demands of low and high frequencies are conflated
  • Digital crossovers, OTOH, implemented in software, allow incredible flexibility and power, including phase correction, response correction and time alignment
So I've been looking at the various approaches to DSP-implemented active crossovers...
  • Buy one - miniDSP for example
    • + easy peasy!! Relatively anyway. 
    • - cost - £200+ probably
    • - flexibility; not sure how true this is, but it would either be a standalone analogue in/out device, like the miniDSP 2x4, or more priceily, that or another variant with possible I2S or USB in/out; but if I want 2- or 3-way XOver capability, then I need enough digital/analogue outputs to enable that; the 2x4 only has 4 outputs, enough for the LXMini, but nothing else; how open-ended do I need it?
  • Use software on some handy platform...
    • RPi - appears to be powerful enough, certainly cheap!
    • Mac OSX - except I want to keep using my lappie...
    • Linux on a cheap PC - also pretty simple
  • IIR vs. FIR - seems to me that FIR is a Good Thing to aim for, if possible, purely because of the phase and impulse response management possible
So, assuming for the moment I'll be going with software-based, since I can do this without a huge outlay initially, to get some experience, I need 
  1. FIR parameter generating software, preferably easy to use
  2. An FIR implementation toolkit 
that can be run on something I have i.e. Mac, Windows or RPi, or some combination.

Currently, BruteFIR looks like a reasonable candidate for 2), and runs on RPi, admittedly less well than on Intel Pentium with the SSE instructions. RePhase is a possibility for 1), except it runs on Windows which means I have to borrow my wife's PC... Since she's currently away for the weekend, maybe now is a good time!

Then I'll need some speakers to test it out with, and so on. I guess I could try the old Boston A100 speakers hidden somewhere in the bedroom - bypass the passive crossover in a reversible way (since they actually belong to my wife!), strap some amplifiers up somehow, maybe just use the RPi and the Yamaha AV amp I have which will accept HDMI from the RPi, and amplify appropriately. Gotta be worth a try!!